Sunday, May 22, 2011


I'm BAAAAACK!
Hello, friends!
I apologize for going MIA this past week...I had a medical concern and tried to power through on Monday and Tuesday, but gave up on Weds and Thursday...Friday and Saturday I was feeling well enough to attend the Beth Moore Living Proof Live Ministry event in the big City...now I'm back...feeling MUCH better (if anyone else has ever had an ovarian cyst rupture you have my sympathy...this was my first and took me down for the count in a BIG way)...and excited to share some fun things I've been working on, as well as some thoughts that have occurred along the way. I hope you had a dazzling week. :)
I apologize for going MIA this past week...I had a medical concern and tried to power through on Monday and Tuesday, but gave up on Weds and Thursday...Friday and Saturday I was feeling well enough to attend the Beth Moore Living Proof Live Ministry event in the big City...now I'm back...feeling MUCH better (if anyone else has ever had an ovarian cyst rupture you have my sympathy...this was my first and took me down for the count in a BIG way)...and excited to share some fun things I've been working on, as well as some thoughts that have occurred along the way. I hope you had a dazzling week. :)
Tuesday, May 17, 2011
Happy Syttende Mai!
Hooray for Norwegian Independence Day!
Boo for not feeling well on this gorgeous day.
Here's wishing you a wonderful day...
Boo for not feeling well on this gorgeous day.
Here's wishing you a wonderful day...
Monday, May 16, 2011
Make a List Monday**May 16, 2011
So we were to make list of what makes the special people in our lives supremely happy. I thought this would be fun for a few reasons...
1. It gives us an opportunity to REALLY watch those love to come up with something (or if they are old enough to dialogue about what they really love).
2. We will have somethign to look back on to remind ourselves (and them) what once made them happy.
Here is what makes my special people super smiley...
(It was hard to narrow it down to three!)
The Spouse
* Movie time...my man loves to just SIT with me.
* Boundary Waters Canoe Area...we are planning a trip for this summer and he gets super happy when we discuss it.
* Family time...when his extended family gathers he adores it...not just the people, but also the games they like to play as a group.
Finn
* LEGOS! Give him a box of legos, a quiet space, and no sisters bothering him and he's set for hours...the only thing he might need is access to Mom to show her his creations. :) He counts it a bonus if he gets to watch videos on his i-touch while he creates.
* Fertile Fair...this is my hometown county fair and he adores it...if you ever want to cheer him up talking about the Fair is a sure fire hit.
* Cuddling with Mommy...he is a TOTAL cuddle bug and is always up for cuddling...which makes Mommy SUPER happy. We do reading lessons while he sits on my lap and I am fully aware of the fact that he dawdles just so we can cuddle longer.
Kiki
* Barbies/Dolls...she loves to play with them and could do it for hours.
* The Little Black Haired Girl...her best friend is so special to her and always makes her smile. They have one of the most true friendships I have ever seen, particularly in young children. They love each other simply because they DO...its really special to watch.
* Food...this little lady ADORES food. Always has, likely always will (here's hoping that her metabolism stays high!) She is always looking for something to eat and is so happy when you say "yes" to her food requests.
Leve
* Being treated like the Big Kids...she has no concept that she is 3 years old...in her mind she's 7! When she is treated like a big kid she is so happy and her face just lights up.
* Stuffed Animals...she loves to cuddle with a stuffed animal. She has a special pig and frog, but she will make do with whatever is available.
* Being the SAME as Kiki...she LOVES to match Kiki...clothing, food, plate, whatever...she just loves to be like Kiki. I am so thankful that Kiki doesn't mind and actually seems to enjoy being Leve's rolemodel.
TJ
* Pulling himself up on things...as I write this he is standing next to the couch playing with his sisters puzzle...and is chatting and smiling to himself.
* Mommy and Daddy...he's stilli nthat fun phase of thinking we hang the moon...when we walk into the room he does the full body wave and convulses with happiness.
* Walks...just walking towards the stroller gets him excited...strapping him in and going for a walk always yields smiles.
I hope you enjoyed taking some time to consider what makes your special people happy.
Are you ready for this week's list? It's going to be more of a "fun" list...what five products "scream" summer to you? Post your list below or email me at stacyathope(at)yahoo(dot)com. See you tomorrow!
1. It gives us an opportunity to REALLY watch those love to come up with something (or if they are old enough to dialogue about what they really love).
2. We will have somethign to look back on to remind ourselves (and them) what once made them happy.
Here is what makes my special people super smiley...
(It was hard to narrow it down to three!)
The Spouse
* Movie time...my man loves to just SIT with me.
* Boundary Waters Canoe Area...we are planning a trip for this summer and he gets super happy when we discuss it.
* Family time...when his extended family gathers he adores it...not just the people, but also the games they like to play as a group.
Finn
* LEGOS! Give him a box of legos, a quiet space, and no sisters bothering him and he's set for hours...the only thing he might need is access to Mom to show her his creations. :) He counts it a bonus if he gets to watch videos on his i-touch while he creates.
* Fertile Fair...this is my hometown county fair and he adores it...if you ever want to cheer him up talking about the Fair is a sure fire hit.
* Cuddling with Mommy...he is a TOTAL cuddle bug and is always up for cuddling...which makes Mommy SUPER happy. We do reading lessons while he sits on my lap and I am fully aware of the fact that he dawdles just so we can cuddle longer.
Kiki
* Barbies/Dolls...she loves to play with them and could do it for hours.
* The Little Black Haired Girl...her best friend is so special to her and always makes her smile. They have one of the most true friendships I have ever seen, particularly in young children. They love each other simply because they DO...its really special to watch.
* Food...this little lady ADORES food. Always has, likely always will (here's hoping that her metabolism stays high!) She is always looking for something to eat and is so happy when you say "yes" to her food requests.
Leve
* Being treated like the Big Kids...she has no concept that she is 3 years old...in her mind she's 7! When she is treated like a big kid she is so happy and her face just lights up.
* Stuffed Animals...she loves to cuddle with a stuffed animal. She has a special pig and frog, but she will make do with whatever is available.
* Being the SAME as Kiki...she LOVES to match Kiki...clothing, food, plate, whatever...she just loves to be like Kiki. I am so thankful that Kiki doesn't mind and actually seems to enjoy being Leve's rolemodel.
TJ
* Pulling himself up on things...as I write this he is standing next to the couch playing with his sisters puzzle...and is chatting and smiling to himself.
* Mommy and Daddy...he's stilli nthat fun phase of thinking we hang the moon...when we walk into the room he does the full body wave and convulses with happiness.
* Walks...just walking towards the stroller gets him excited...strapping him in and going for a walk always yields smiles.
I hope you enjoyed taking some time to consider what makes your special people happy.
Are you ready for this week's list? It's going to be more of a "fun" list...what five products "scream" summer to you? Post your list below or email me at stacyathope(at)yahoo(dot)com. See you tomorrow!
Saturday, May 14, 2011
Questions Saturday**May 14, 2011
Q: What does a typical day at your house look like?
A: Still working out "typical", but we're getting warmer! I'm sure my house hold is just like yours in that "normal", "typical", and "regular" are relative terms! Here's what the rhythm of our day looks like:
-Up*Breakfast*Put dishes away.
-Get ready to "hit the day"...hair combed, clothes on, diapers changed, etc.
-Mom checks email/facebook/blog stuff while the kids do their chores
-Activities begin...this is our school time...we like the term "activities"...things we're doing to learn. I usually make any business/work calls while they have independent work time. I try to limit those calls to those that will be short and to the point so that I can be right back with them if needed. This is also when TJ takes his morning nap.
-Mom preps lunch while the kids take some time outside or just play on their own.
-Lunch is served! Dishes are put in dishwasher.
-Nap/Rest time...TJ and Leve sleep. Finn and Kiki will nap if I lay down with them, but without the spouse I have come to really need that time to do work on the computer, clean up, do Biblestudy, etc. so they now have quiet time...they must be in their rooms playing quietly...toys, reading books, whatever is fine so long as they are quiet and stay put. We have also started using some of quiet time to finish activities from the morning that didn't get completed...or things that Leve would not let happen with out distracting the person needing to do it!
-After rest time is usually when we do something as a group...run errands, go to the park, go for a walk, do our nature notebooks, play with a friend...that sort of thing.
-Supper...kitchen cleaned afterwards while kids tidy up their rooms.
-Bedtime routine commences.
-Mom stays up and does things around the house or does things for work on the computer.
-Mom goes to bed.
Now, of course there are days when that plan gets totally scrapped...today was one of those days...my kids do fine with that so long as they are told the plan and we get back to "normal" as quickly as possible.
Do you have a question that you'd like featured on a Saturday? Feel free to leave it in the comments section or email me at stacyathope(at)yahoo(dot)com.
A: Still working out "typical", but we're getting warmer! I'm sure my house hold is just like yours in that "normal", "typical", and "regular" are relative terms! Here's what the rhythm of our day looks like:
-Up*Breakfast*Put dishes away.
-Get ready to "hit the day"...hair combed, clothes on, diapers changed, etc.
-Mom checks email/facebook/blog stuff while the kids do their chores
-Activities begin...this is our school time...we like the term "activities"...things we're doing to learn. I usually make any business/work calls while they have independent work time. I try to limit those calls to those that will be short and to the point so that I can be right back with them if needed. This is also when TJ takes his morning nap.
-Mom preps lunch while the kids take some time outside or just play on their own.
-Lunch is served! Dishes are put in dishwasher.
-Nap/Rest time...TJ and Leve sleep. Finn and Kiki will nap if I lay down with them, but without the spouse I have come to really need that time to do work on the computer, clean up, do Biblestudy, etc. so they now have quiet time...they must be in their rooms playing quietly...toys, reading books, whatever is fine so long as they are quiet and stay put. We have also started using some of quiet time to finish activities from the morning that didn't get completed...or things that Leve would not let happen with out distracting the person needing to do it!
-After rest time is usually when we do something as a group...run errands, go to the park, go for a walk, do our nature notebooks, play with a friend...that sort of thing.
-Supper...kitchen cleaned afterwards while kids tidy up their rooms.
-Bedtime routine commences.
-Mom stays up and does things around the house or does things for work on the computer.
-Mom goes to bed.
Now, of course there are days when that plan gets totally scrapped...today was one of those days...my kids do fine with that so long as they are told the plan and we get back to "normal" as quickly as possible.
Do you have a question that you'd like featured on a Saturday? Feel free to leave it in the comments section or email me at stacyathope(at)yahoo(dot)com.
Friday, May 13, 2011
Silhouette Memo Board
Each year I get a huge kick out of helping Anne's girls make their Mother's Day gift...this year I saw this cute idea and had to give it a try...who doesn't love their little ones' silhouettes?!
Here's how you can make your own:
First, get a piece of wood...approximately 12"x12"
Sand it to get any rough portions off.
Paint it with a few coats until the color is uniform. (This is the green portion of our boards.)
While this dries make your silhouettes...there are two routes to go.
Option 1 is to actually trace their silhouette. You'll need a piece of freezer paper or other heavier paper that won't allow the paint to bleed through. Tape it on a wall at the child's level. Use a lamp to cast a shadow. Trace the child with pencil. this requires the child to be VERY still or your ability to hold the child's head still while still manuevering the pencil.

Option 2 is to take a photo of the child's silhouette...print it on a full sheet of paper...depending on your board size you may want to enlarge the picture to get the silhouette to fill the entire board.

Once you have your silhouettes cut the shape out in a continuous cut.
When your board is dry tape your silhouette to the board. I used double stick tape on the backside.

Next use your chalkboard paint to paint the silhouette shape. We used a brush...however, unless your paper is such that bleeding won't occur AND you're very good at making sure there are no lines in your paint when it dries I would suggest a small foam roller with minimal paint on it. this will help eliminate the lines as the paint will go on more uniformally; also diminishing the probability of bleed through for the paint. It took us three coats of chalkboard paint to have adequate coverage.


Once it was dry we peeled off the paper and the tape. We were met with bleed through...so we touched up the green portions to get a nice crisp silhouette again.
To finish it off we put two eyelet screws in the top.

Added ribbon for hanging.

A great day brightener for anyone!
Here's how you can make your own:
First, get a piece of wood...approximately 12"x12"
Sand it to get any rough portions off.
Paint it with a few coats until the color is uniform. (This is the green portion of our boards.)
While this dries make your silhouettes...there are two routes to go.
Option 1 is to actually trace their silhouette. You'll need a piece of freezer paper or other heavier paper that won't allow the paint to bleed through. Tape it on a wall at the child's level. Use a lamp to cast a shadow. Trace the child with pencil. this requires the child to be VERY still or your ability to hold the child's head still while still manuevering the pencil.

Option 2 is to take a photo of the child's silhouette...print it on a full sheet of paper...depending on your board size you may want to enlarge the picture to get the silhouette to fill the entire board.

Once you have your silhouettes cut the shape out in a continuous cut.
When your board is dry tape your silhouette to the board. I used double stick tape on the backside.

Next use your chalkboard paint to paint the silhouette shape. We used a brush...however, unless your paper is such that bleeding won't occur AND you're very good at making sure there are no lines in your paint when it dries I would suggest a small foam roller with minimal paint on it. this will help eliminate the lines as the paint will go on more uniformally; also diminishing the probability of bleed through for the paint. It took us three coats of chalkboard paint to have adequate coverage.


Once it was dry we peeled off the paper and the tape. We were met with bleed through...so we touched up the green portions to get a nice crisp silhouette again.
To finish it off we put two eyelet screws in the top.

Added ribbon for hanging.

A great day brightener for anyone!
Thursday, May 12, 2011
TJ's New Hat Tutorial
So my darling little man was sitting out in the sun the other day and needed a hat. Here is the one that fit him.

Now, I'm not one who says that boys need to wear blue and girls need to wear pink...I say let's all wear what we like! That being said I do not get a kick out of people saying, "What a cute little girl!" whilst gazing up on my little boy. Alas, this Mama decided to make a new hat. Have I made a lot of hats in the past you ask...Nope. Did I have a pattern? Nope. No problem...I had a perfect pink hat to work off of!
First things first. I created the sides of the hat. I used the pieces that were on the pink hat; tracing them onto cardboard and giving myself a little extra around all the edges for seam allowances. I cut four of them as the hat is lined.

Next I made the very top of the hat. I cut out two of them.

Then, I folded all the pieces in half and marked the center with a pin.

Then, lining up the center pins I put right sides together and pinned both the outside and the lining (inside) together to prepare to sew.


Once they were pinned I sewed both the outside and the lining. Next, I turned one of them the other direction and fitted them into one another with wrong sides together. I pinned them together and trimmed of any excess that was hanging over.


I then got to work on the brim. I cut two of them and sewed them right sides together. I then flipped them over and stitched the outter brim to give it a more finished look.
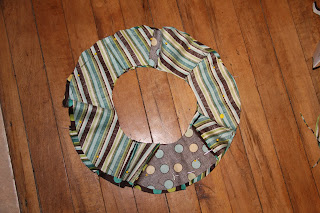

Then, I lined up the brim to the head part and pinned together carefully with the sides that would be showing when he wore it pinned together.

Next was two neck straps...essentially rectangles sewn right sides together, then flipped and sewed into the head portion of the hat.

Add a little velcro to these and you're set. :)

Here is my little man in his hat.


You're probably laughing, as I am....this hat is even more feminine than the first one! (Blasted brim!)
I guess I'll need to get used to hearing "What a cute little girl" this summer!

Now, I'm not one who says that boys need to wear blue and girls need to wear pink...I say let's all wear what we like! That being said I do not get a kick out of people saying, "What a cute little girl!" whilst gazing up on my little boy. Alas, this Mama decided to make a new hat. Have I made a lot of hats in the past you ask...Nope. Did I have a pattern? Nope. No problem...I had a perfect pink hat to work off of!
First things first. I created the sides of the hat. I used the pieces that were on the pink hat; tracing them onto cardboard and giving myself a little extra around all the edges for seam allowances. I cut four of them as the hat is lined.

Next I made the very top of the hat. I cut out two of them.

Then, I folded all the pieces in half and marked the center with a pin.

Then, lining up the center pins I put right sides together and pinned both the outside and the lining (inside) together to prepare to sew.

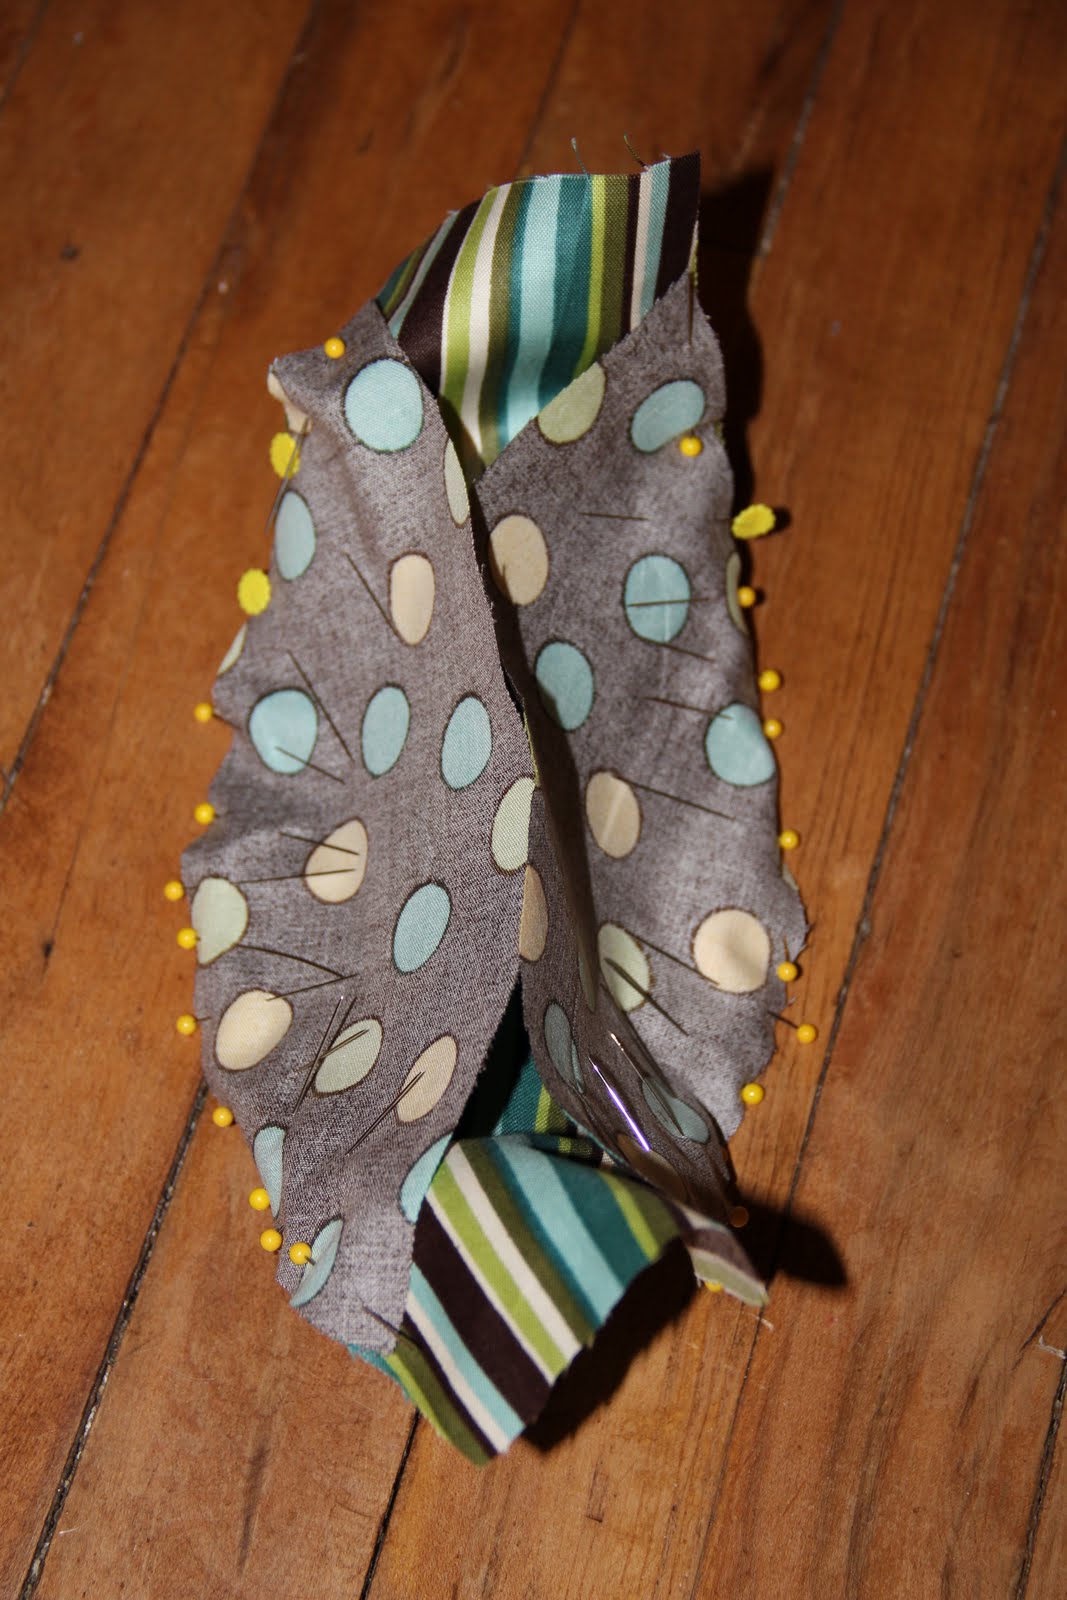
Once they were pinned I sewed both the outside and the lining. Next, I turned one of them the other direction and fitted them into one another with wrong sides together. I pinned them together and trimmed of any excess that was hanging over.


I then got to work on the brim. I cut two of them and sewed them right sides together. I then flipped them over and stitched the outter brim to give it a more finished look.


Then, I lined up the brim to the head part and pinned together carefully with the sides that would be showing when he wore it pinned together.

Next was two neck straps...essentially rectangles sewn right sides together, then flipped and sewed into the head portion of the hat.

Add a little velcro to these and you're set. :)

Here is my little man in his hat.


You're probably laughing, as I am....this hat is even more feminine than the first one! (Blasted brim!)
I guess I'll need to get used to hearing "What a cute little girl" this summer!
Subscribe to:
Posts (Atom)