I thought long and hard about what to get TJ for Christmas. It's tricky when he's 22 months and can't express anything he WANTS. Even more so when he has 3 older siblings that have received just about every conceivable type of toy there is in the 8 Christmas' previous. So, I gave up on "needs" and thought, "What sort of toy do I want to be able to give him for HIS kids to play with some day?"
Well, I thought of the toy that my brothers and I played with that had belonged to my Dad...it was a metal pedal car and we LOVED it...it looked really similar to this one.

I decided a ride-on would be just right for his age.
So I started to look online. Wowzas...there are loads of choices that I would classify as heirloom quality...

But, with prices ranging from $79 to $548 (for reals...the airplane in the upper left is $548...BUT you do get free shipping!;)!) They weren't exactly in my price range.
So, what do we do, Girls?!
If you know me you know the answer, "We make it ourselves!" I found a cute option online and did my best to copy-cat.

Here's what I bought:
1 inch thick plywood
1 2" dowel
4 caster wheels
1 U bolt
2 Acorn nuts to match Ubolt
Stain Gel
You'll also need:
Sand paper (I used fine, medium, and coarse)
A cloth for the stain
Saw (band saw or hand-held jig is fine)
Screwdriver with both screw head and drill bits
3 screws
I started by cutting my dowels into 6" lengths.
I determined that I wanted the seat to be about 10" off the ground (this is what most standard ride-ons sit at) and determined that the wheels were 2", the pieces of plywood were each 1", so I needed an additional 6" to get to 10".

Next, I used plates to make the top and the bottom piece. First the length: the top is 16" long and the bottom is 18" long. Then width: top is 8" and the bottom is 10". I then found the middle of the pieces and marked where the indent should go to accomodate shorter legs.


After they were marked, I cut them out. No. I do not have a workshop. I have a kitchen table and a hand-held jig saw. Classy, I know....and also gives me license to tell you to put the excuse of "I don't have a place to do it" or "I don't have a lot of equipment" on the shelf!
Once cut out I used coarse, medium, and then fine sandpaper to smooth out the pieces. Once done I used a damp (not WET) cloth to pick up any left over dust from the pieces.
Next, I marked where the dowels and U bolt were going to go and I drilled the holes for the U bolt and sanded those little pieces that came up.
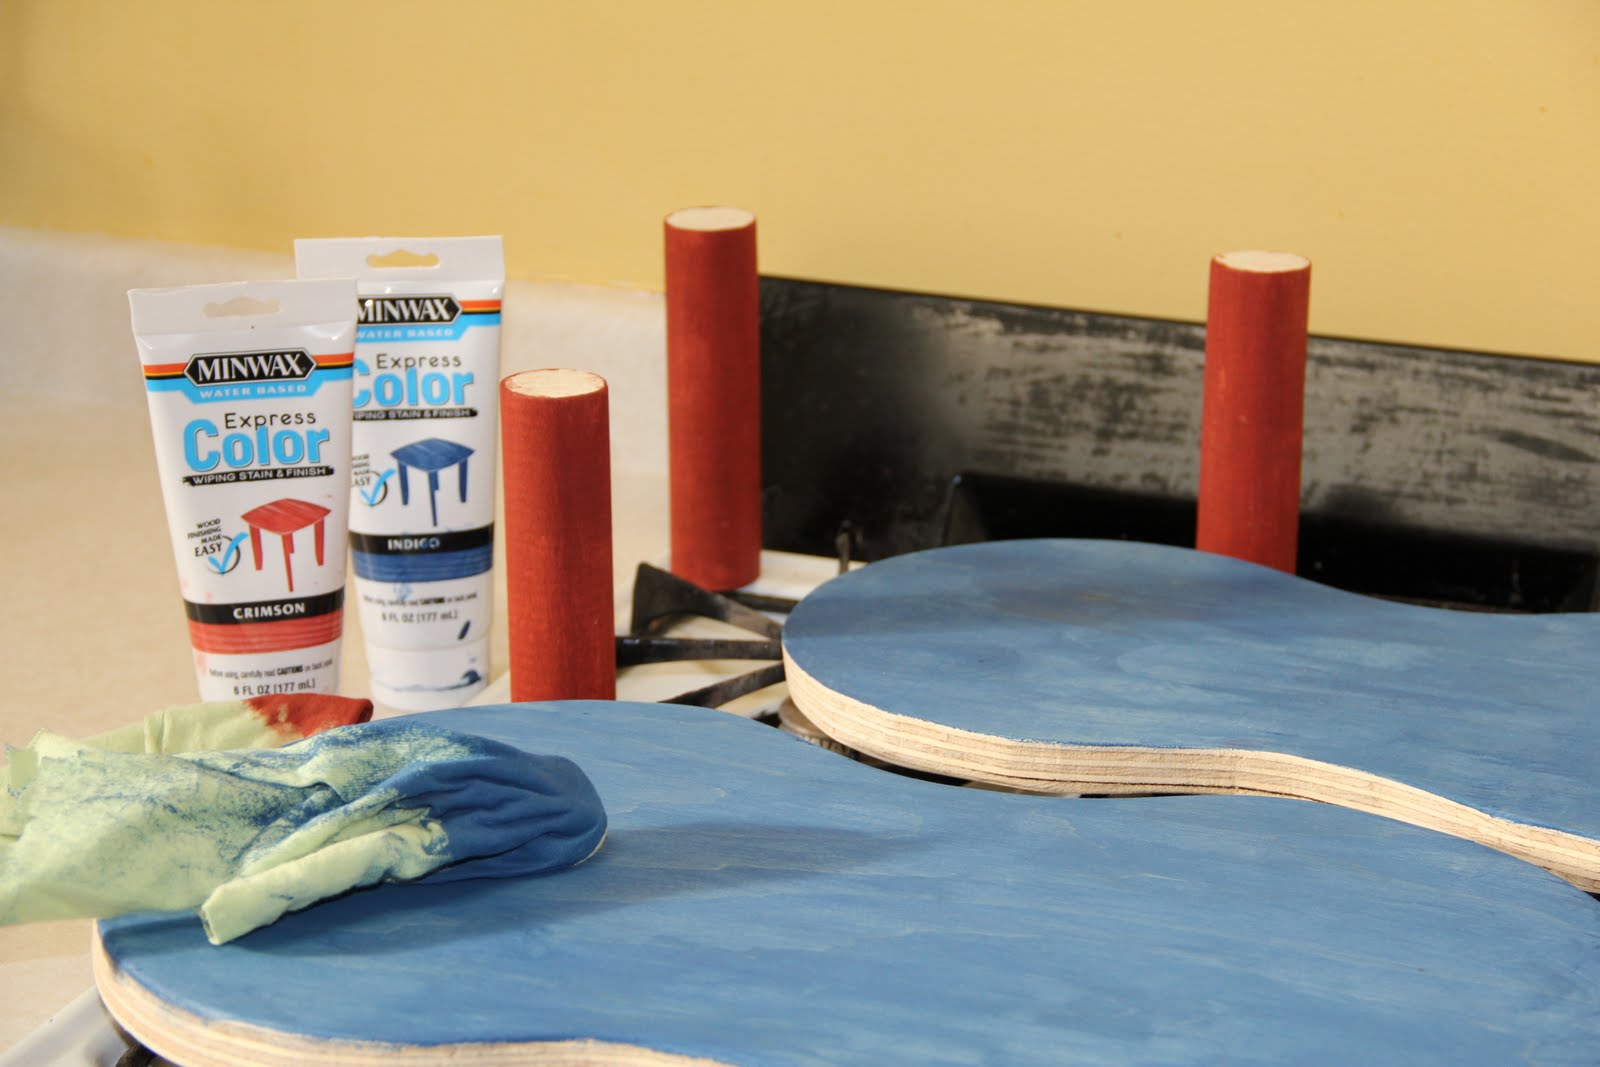
Next we stained the dowels and the bottom of the top piece and the top of the bottom piece. Confused? Basically we stained anything that wasn't going to have a screw showing out of it.
The older kids have been in on this project and they helped me pick blue and red for our stain. We went with stain over paint simply because we wanted the wood-grain to show through and give it a more natural feel.
More tomorrow as we finish TJ's Scooter. :)
1 comment:
Can't wait to see the end product! I myself have eyed the metal airplane...being that all things airplanes are high on the boys list, but also can't justify it even nwith daddy being a pilot!
Post a Comment